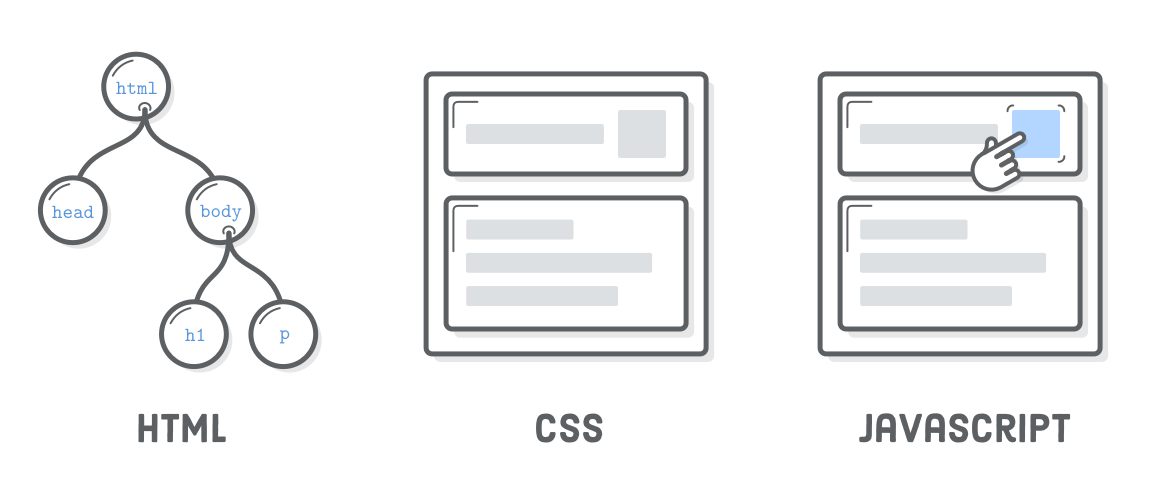
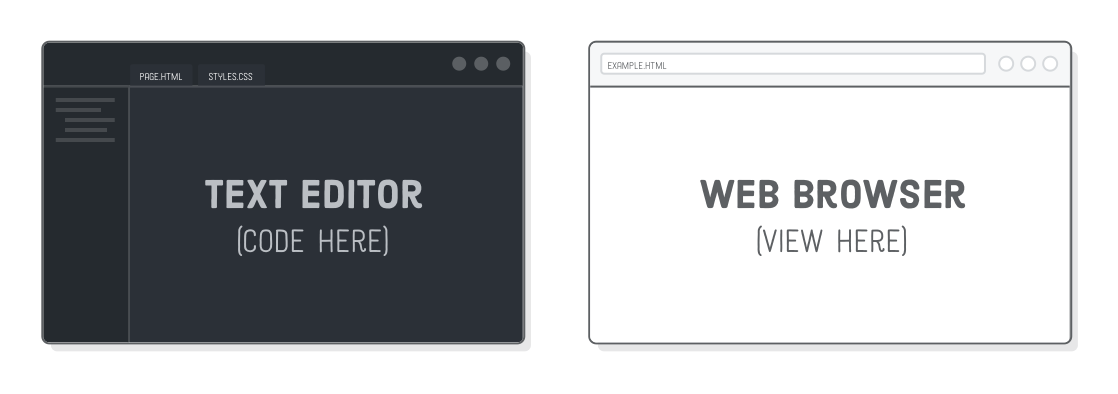
Learning HTML and CSS is hard, but it doesn’t have to be. This 14-chapter tutorial is one of the friendliest HTML and CSS guides on the Internet. We’ll walk you through everything from selecting a good text editor (which is surprisingly important) to building full-fledged, professional-quality web pages from scratch.

Diagram: a person creating web pages

We designed HTML & CSS Is Hard to be the only introduction to HTML and CSS that you’ll ever need. If you put in the effort to read every section and write every code snippet, this tutorial has the potential to replace hundreds or even thousand of dollars worth of online courses and live training.

Our goal is to make it as easy as possible for complete beginners to become professional web developers, so if you’ve never written a line of HTML or CSS, but you’re contemplating a career shift, grab a cup of coffee, take a seat, and let’s get to work.

HTML, CSS, & JavaScript

HyperText Markup Language (HTML), Cascading Style Sheets (CSS), and JavaScript are the languages that run the web. They’re very closely related, but they’re also designed for very specific tasks. Understanding how they interact will go a long way towards becoming a web developer. We’ll be expanding on this throughout the tutorial, but the gist of it is:

  • HTML is for adding meaning to raw content by marking it up.
  • CSS is for formatting that marked up content.
  • JavaScript is for making that content and formatting interactive.

Think of HTML as the abstract text and images behind a web page, CSS as the page that actually gets displayed, and JavaScript as the behaviors that can manipulate both HTML and CSS.

Diagram: HTML as a tree of nodes, CSS as a rendered web page, JavaScript as an interactive web page with fancy behaviors

For example, you might mark some particular run of text as a paragraph with this HTML:

<p id='some-paragraph'>This is a paragraph.</p>

Then, you can set the size and color of that paragraph with some CSS:

p {
  font-size: 20px;
  color: blue;
}

And, if you want to get fancy, you can re-write that paragraph when the user clicks it with some JavaScript (we’ll save the fancy stuff for a future tutorial):

var p = document.getElementById('some-paragraph');
p.addEventListener('click', function(event) {
  p.innerHTML = 'You clicked it!';
});

As you can see, HTML, CSS, and JavaScript are totally different languages, but they all refer to one another in some way. Most websites rely on all three, but the appearance of every website is determined by HTML and CSS. That makes this tutorial a great starting point for your web development journey.

Languages Versus “Web Development”

Unfortunately, mastering HTML, CSS, and JavaScript is only a prerequisite for becoming a professional web developer. There are a bunch of other practical skills that you need to run a website:

  • Organizing HTML into reusable templates
  • Standing up a web server
  • Moving files from your local computer to your web server
  • Reverting to a previous version when you screw something up
  • Pointing a domain name at your server

Dealing with these complexities involves setting up various “environments” to organize your files and handle the building/deploying of your website. All of this is orthogonal to the actual HTML, CSS, and JavaScript code that make up a website. This tutorial focuses entirely on the languages of HTML and CSS—not setting up those underlying environments.

Diagram: HTML, CSS, and JavaScript pointing to web development (build tools, domain name, web server), turning into a website

But, don’t be overwhelmed. Gaining fluency in HTML and CSS is a significant first step towards becoming a real web developer. We just don’t want you to walk away from this tutorial thinking that you’ll be able to launch a full website on your own. You will, however, have the skills to recreate the vast majority of web pages on the Internet.

Web Publishing

So, what is it to “learn” HTML and CSS? We like to look at it through a historical lens into the printing industry. Back in the days of the original printing press, printers created documents by arranging metal characters, dipping them in ink, and pressing them onto a piece of paper.

In a lot of ways, that’s exactly what web developers do, except instead of arranging moveable type, they write HTML and CSS. We’re concerned with the same task as they were: conveying content in meaningful ways. We even deal with the same presentational issues they did, like selecting the font to use, setting the size of headings, and determining the space between lines of text.

Diagram: metal type turning into HTML and CSS, printed page turning into web page, book turning into website

Printers used to print a bunch of pages and bind them into a book. Nowadays, we create a bunch of HTML files and link them together into a website. Learning HTML and CSS is a matter of understanding the available HTML markup and CSS rules to make a browser render those files exactly how they’re supposed to.

Fundamentals, Not Frameworks

There’s all sorts of front-end web development frameworks out there (Bootstrap, ZURB foundation, and Pure CSS, just to name a few). The goal of every single one of them is to abstract away some of the redundant aspects of creating web pages from scratch. These kinds of frameworks are an important part of real-world web development, and they’re definitely worth exploring—but only after mastering the basics with HTML & CSS Is Hard.

This tutorial is about HTML and CSS fundamentals. You’ll walk away with the ability build pretty much anything you’ll ever need as a web developer with raw HTML and CSS. This is stuff that stays with you forever, in spite of shiny new additions to the HTML and CSS standards or trendy new frameworks that help you do things faster.

Hands-On Learning

Interneting Is Hard is all about hands-on education. With the exception of what you’ve already read, the entirety of this tutorial revolves around concrete examples, explaining the conceptual aspects of HTML and CSS along the way.

To get the most of out this tutorial, you should be actively creating web pages and following along with every single step of each chapter. If you’re serious about becoming a web developer, you should be typing each code snippet character-by-character instead of copy-and-pasting them into your text editor.

Why? Because this is what you’ll actually be doing as a real web developer. Typing out code examples ingrains the muscle memory that will serve you well once you’re out in the wild and marking up content for real websites.

Tools of the Trade

For this tutorial, a decent text editor and web browser is all you need. Your basic workflow is to write code in your text editor, then open it up in a web browser to see how it looks. As you start creating your own websites, you’ll eventually add more tools to your toolbox, but it’s important to start out minimal and thoroughly learn the fundamentals of HTML and CSS.

Diagram: text editor (code here) versus web browser (view here)

That said, take the time to get really good at using your text editor. Decent ones come with features that let you write code faster than you normally could, like auto-completing tags, jumping around your text, and navigating your file system. Fully leveraging your text editor is the craftsmanship part of learning HTML and CSS.

The only real prerequisite for a good web browser is that it’s up to date and in mainstream usage. Chrome and Firefox are favorites amongst web developers. Safari is alright if you’re running OS X, too. We strongly suggest not creating websites with Internet Explorer. Professional web development often requires an efficient way to test code on all of these browsers, but that’s a little more complicated than what we need right now.

Atom Text Editor

We recommend the Atom text editor. It’s user friendly even for beginners, provides all the useful features we mentioned above, and is available for all major operating systems. It’s also infinitely configurable, which will become important as you identify repetitive tasks that you can automate.

If you don’t already have Atom, go ahead and download it now, since you’ll be needing it for the next chapter. Once you’ve downloaded it, open it up so we can take a brief tour of its major features. You should see two panes with different welcome screens:

Screenshot: the welcome screen of the Atom text editor

We don’t need either of these welcome screens, so close both of them by clicking the x icon in their corresponding tabs. You can also use the Cmd+W (Mac) or Ctrl+W (Windows/Linux) shortcut to close them (shortcuts are great, use them whenever you can). You should be left with a single untitled tab.

Creating a Project

Each website you work on in Atom is a “project,” which is essentially just a folder on your file system that contains a bunch of HTML and CSS files. Let’s explore Atom by creating a fake project and adding a few text files to it. Click File > Open in the menu bar to open a file dialog window, then select New Folder to create a new folder. Call it hello-atom, and click Open.

Screenshot: file browser in the left sidebar of the Atom text editor interface, editor area on the right

You should now see a sidebar on the left of the interface that says hello-atom at the top next to a little folder icon. This is our file browser. Of course, it won’t show anything until we add some files, so let’s do that next.

Creating Files

Add some arbitrary text to that untitled tab, then hit Cmd+S (Mac) or Ctrl+S (Windows, Linux) to save the file. Call it page-one.html. After saving it, you should see it appear in Atom’s file browser.

Let’s make one more file by hitting Cmd+N (Mac) or Ctrl+N (Windows, Linux). This will create another untitled tab. As with our last file, add whatever text you want, then save it as page-two.html.

Again, one of the most important aspects of a proper text editor is to let you efficiently navigate all the files in your project. In Atom, you can select the tab of the file you want to work on or find it in the file browser on the left side of the interface. You can also use Ctrl+Tab to switch between open tabs.

Screenshot: Atom’s file browser after creating a few HTML files

That’s all fine and dandy for browsing files, but there are a lot of times when you’re searching for a specific file. For instance, imagine discovering a broken link on your website while you’re doing some quality assurance. You want to be able to jump into that file with Atom to fix the link as quickly as possible.

Screenshot: results in Atom’s fuzzy search bar

For that, you need Atom’s fuzzy finder, which is accessible via Cmd+T (Mac) or Ctrl+T (Windows, Linux). When you press this, Atom will open up a search bar and let you type any part of the filename you’re looking for. Try closing both tabs, hitting Cmd+T or Ctrl+T, and entering “one”. The page-one.html file should pop up, and you can hit Enter to edit it. This functionality is indispensable once your project grows to a few dozen files spread across several folders.

Multiple Panes

Atom not only lets you have multiple tabs, but multiple panes as well. To see what we’re talking about, try right-clicking one of the files in the file browser and selecting Split Right. This will open that file in a new pane, allowing you to see multiple files at the same time.

Screenshot: two side-by-side panes in the Atom text editor

Multiple panes are really useful for examining a CSS file and its related HTML file at the same time.

Outside of Atom

Finally, we’ll occasionally need to work with files outside of the Atom interface (e.g., when we want to copy image files into our website). We can use the operating system’s built-in file browser for this. Right-click a file in Atom’s file browser, then select Show in Finder/Explorer/Some Other File Browser to open it up in your system’s default file browser.

From here, you can add new files, create folders, or open up HTML files in a web browser. That last one is going to become a common task for the rest of this tutorial, so let’s give it a shot with our page-one.html file. Right-click it in your system’s default file browser and select Open With > Chrome/Firefox/Safari. You should see whatever text you added to the file rendered as a web page in your default web browser.

Diagram: Editing in a text editor, looking at changes in a web browser

Now, you can edit the contents of page-one.html in Atom, save it, and reload it in your web browser by pressing Cmd+R (Mac) or Ctrl+R (Windows, Linux). This is the basic editing workflow for all web developers, and you’ll become very, very accustomed to it by the time you’re done working through the next 13 chapters.

Summary

Congratulations! You’ve completed your first step towards becoming a professional web developer. Hopefully, this chapter has given you a basic understanding of how HTML and CSS fit into the broader industry of web development and the general philosophy behind HTML and CSS Is Hard.

The Atom stuff we just covered is going to become part of our daily routine, so make sure you’re comfortable with everything before moving on. We encourage you to play with the example project a bit, adding more files and practicing navigating from one to the other. Mastering the craft of writing HTML and CSS is what distinguishes amazingly productive developers from average ones.

Now that we’ve got a proper text editor, we’re ready to start coding up some real web pages. We’ll start by exploring the most common HTML elements over the next two chapters, then we’ll add some CSS to the mix.